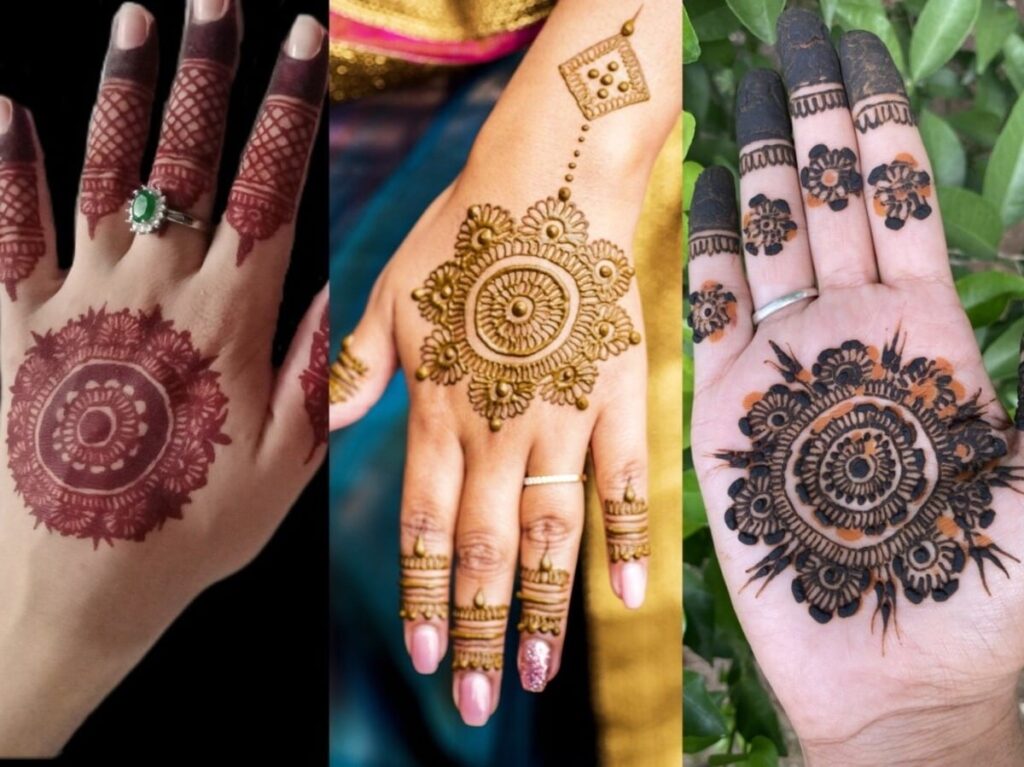
Applying mehndi (henna) can often seem like a daunting task, especially for those who might not have prior experience or artistic skills. However, with a few simple tools and tricks, you can create stunning and intricate designs that look professional. This guide will introduce you to an innovative method of applying mehndi using everyday items such as bangles, coins, and brushes, making the art of mehndi accessible to everyone.
Understanding Mehndi and Its Cultural Significance
Mehndi, a popular form of body art originating from the Indian subcontinent, has a rich cultural history. It is commonly applied during various celebrations, including weddings, festivals, and other significant life events. The designs can range from simple patterns to elaborate motifs, each carrying its unique meanings and significance.
Tools You Will Need
Before you start, gather the following tools that will help you create an attractive mehndi design:
- Bangles: These can be used to create circular patterns and guide your hand during application.
- Coins: Small coins can act as stamps, helping to create neat designs without the need for intricate hand movements.
- Brushes: A small, fine-tipped brush allows for better control and precision when applying mehndi.
Step-by-Step Guide to Easy Mehndi Application
Follow these simplified steps to master your mehndi application using the mentioned tools:
- Prepare Your Workspace: Ensure that you have a clean surface and all your tools ready. It’s best to work in good lighting.
- Apply Base Mehndi: Start by applying a base layer of mehndi on your chosen area, ensuring an even coating.
- Create Circular Patterns with Bangles: Use the inner circle of bangles to draw circles on your skin. You can fill these circles with designs like dots or floral patterns.
- Stamp Designs with Coins: Dip a coin in the mehndi and press it gently onto your skin to create uniform, stamped patterns.
- Detailing with a Brush: Utilize a fine brush to add intricate details around the stamped designs or circles, enhancing the overall look.
- Let It Dry: Allow the mehndi to dry completely for the best color payoff. The darker the mehndi, the better the design looks.
Tips for Best Results
| Tip | Description |
|---|---|
| Choose Quality Henna | Ensure you use high-quality henna powder for a darker and longer-lasting stain. |
| Test for Allergies | Always do a patch test on a small area of skin to check for any allergic reactions. |
| Stay Hydrated | Drink plenty of water before applying mehndi to keep your skin healthy and prevent cracking. |
| Time Your Application | Apply mehndi when you have a few hours to spare, as longer application times lead to better results. |
Conclusion
Applying mehndi may seem challenging at first, but with the right tools and techniques, anyone can create beautiful designs. Using everyday items like bangles, coins, and brushes not only simplifies the process but also enhances creativity. Whether for a festival or a special occasion, these easy tricks will help you achieve eye-catching mehndi designs that reflect your personal style. So gather your tools, and let the creativity flow!
